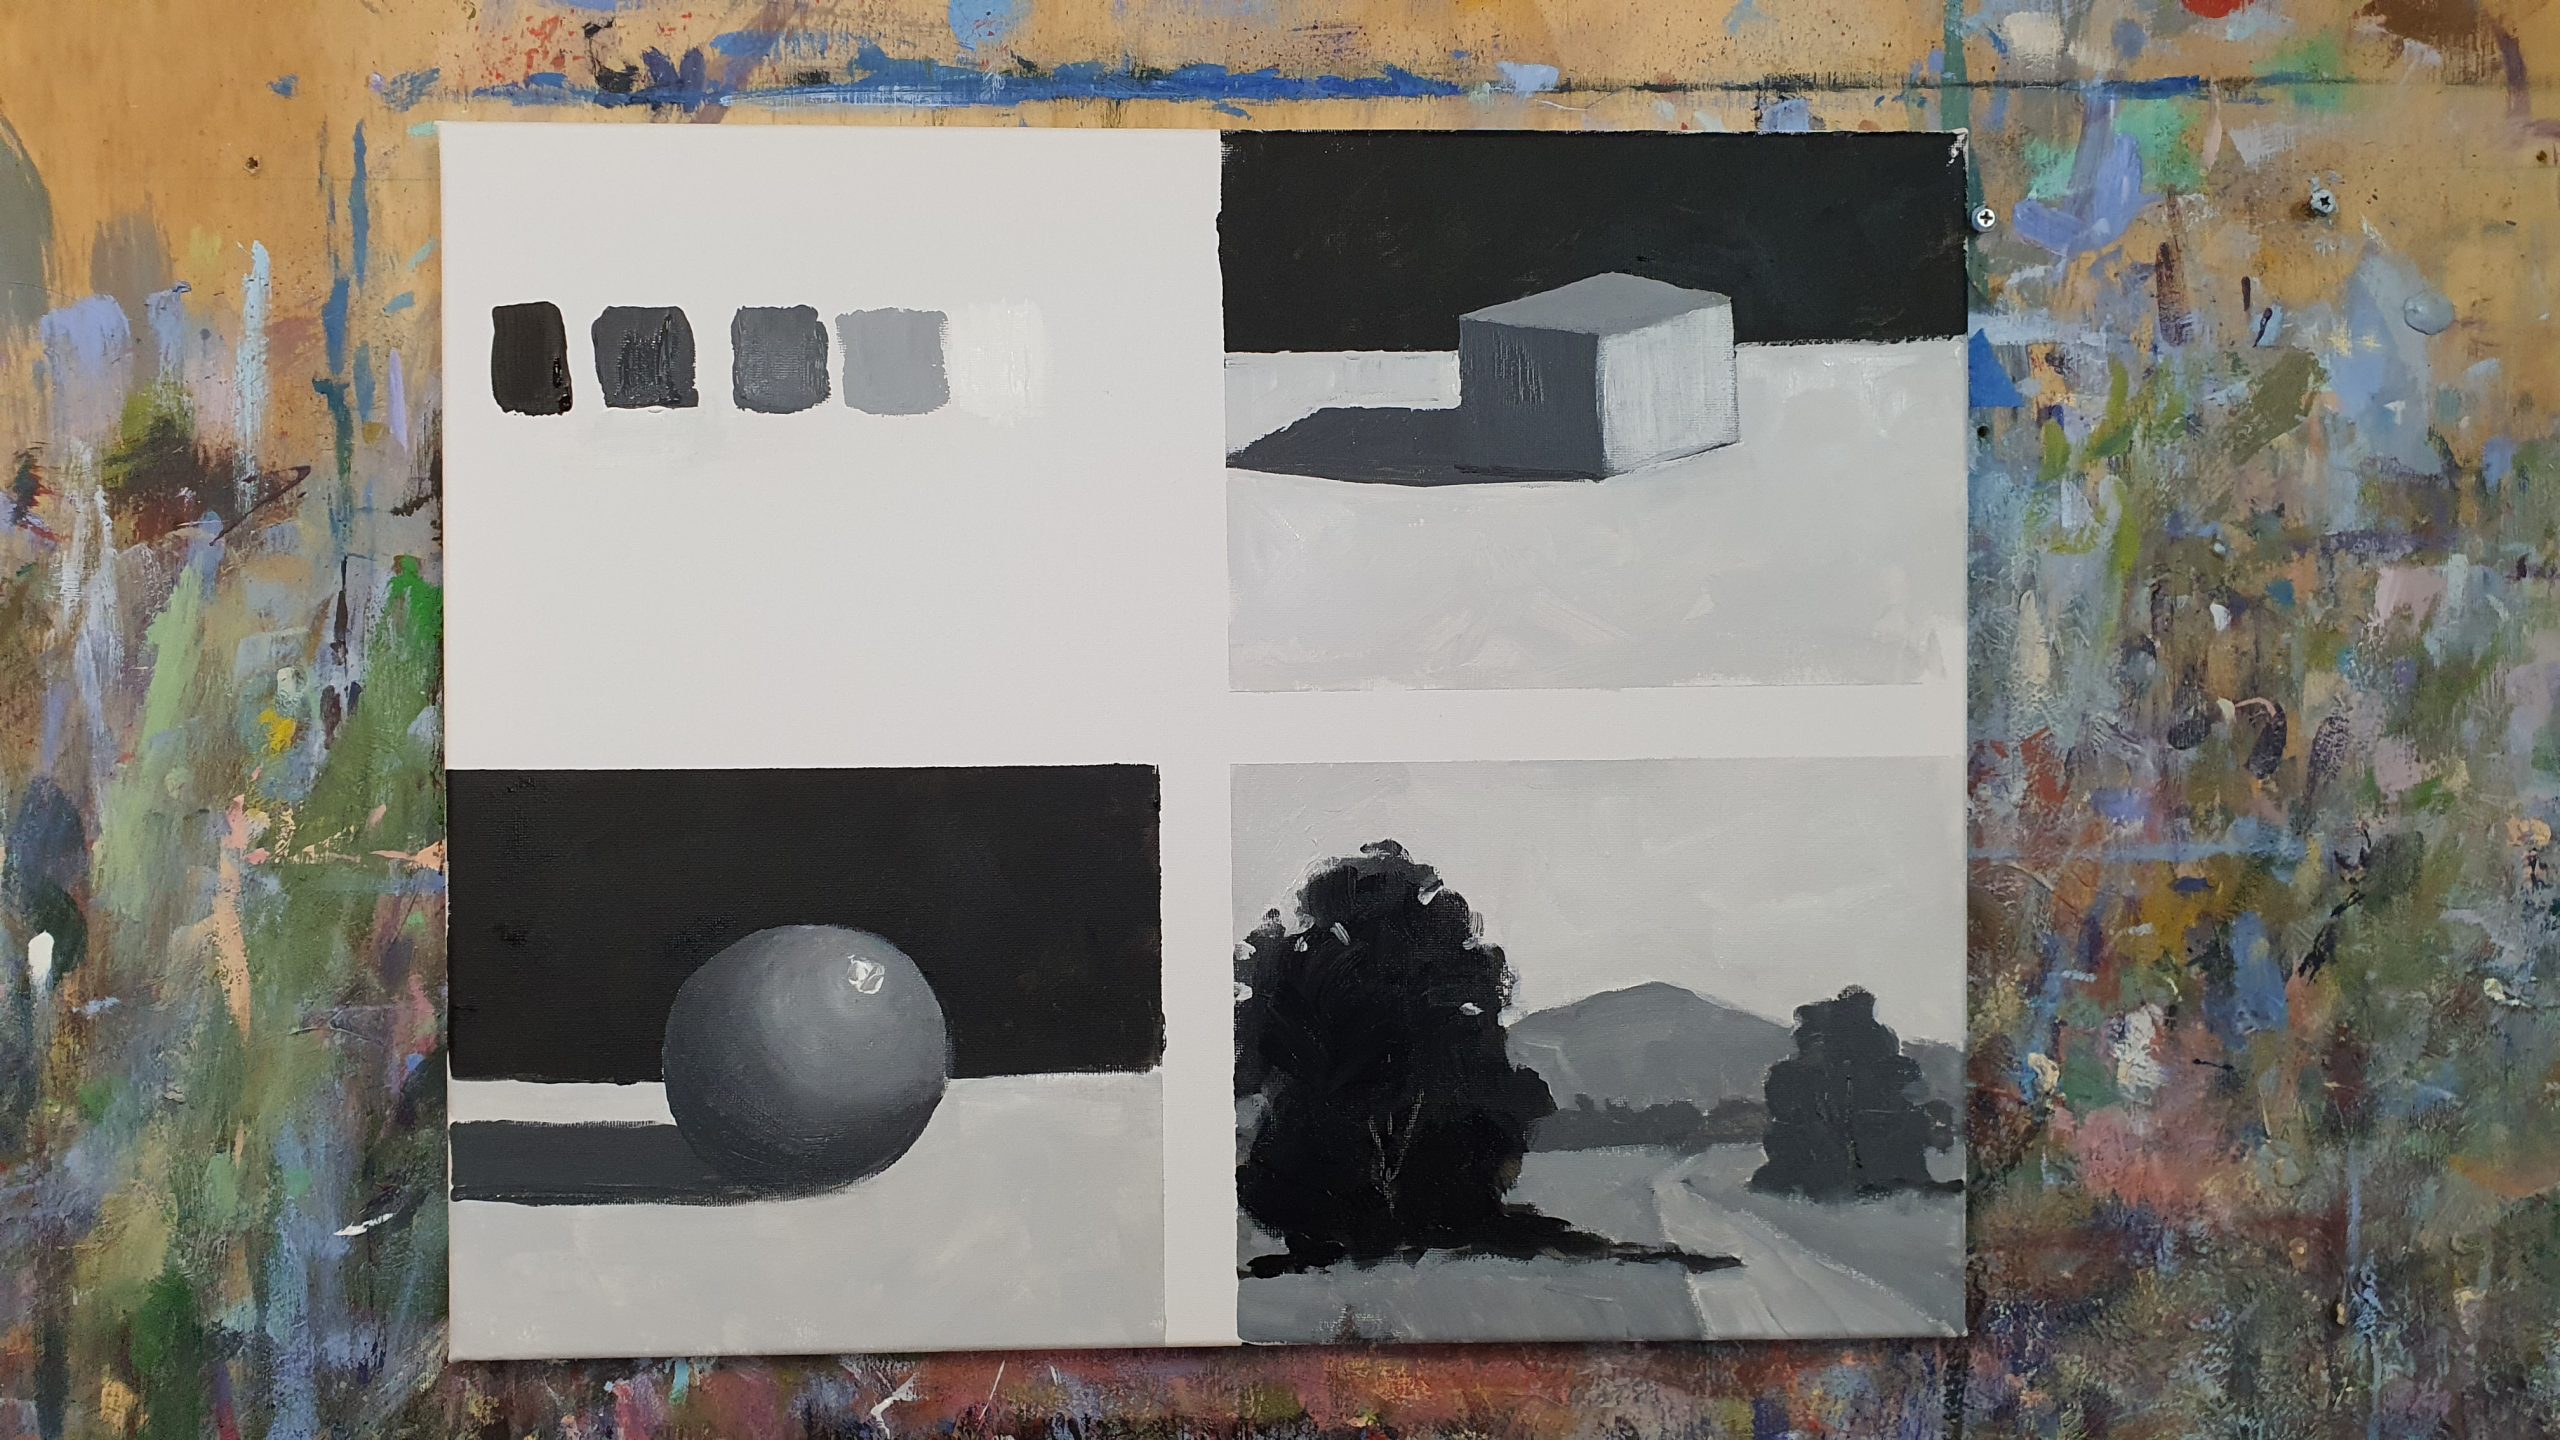
Importance Of Values Studies When Learning To Paint
November 17, 2020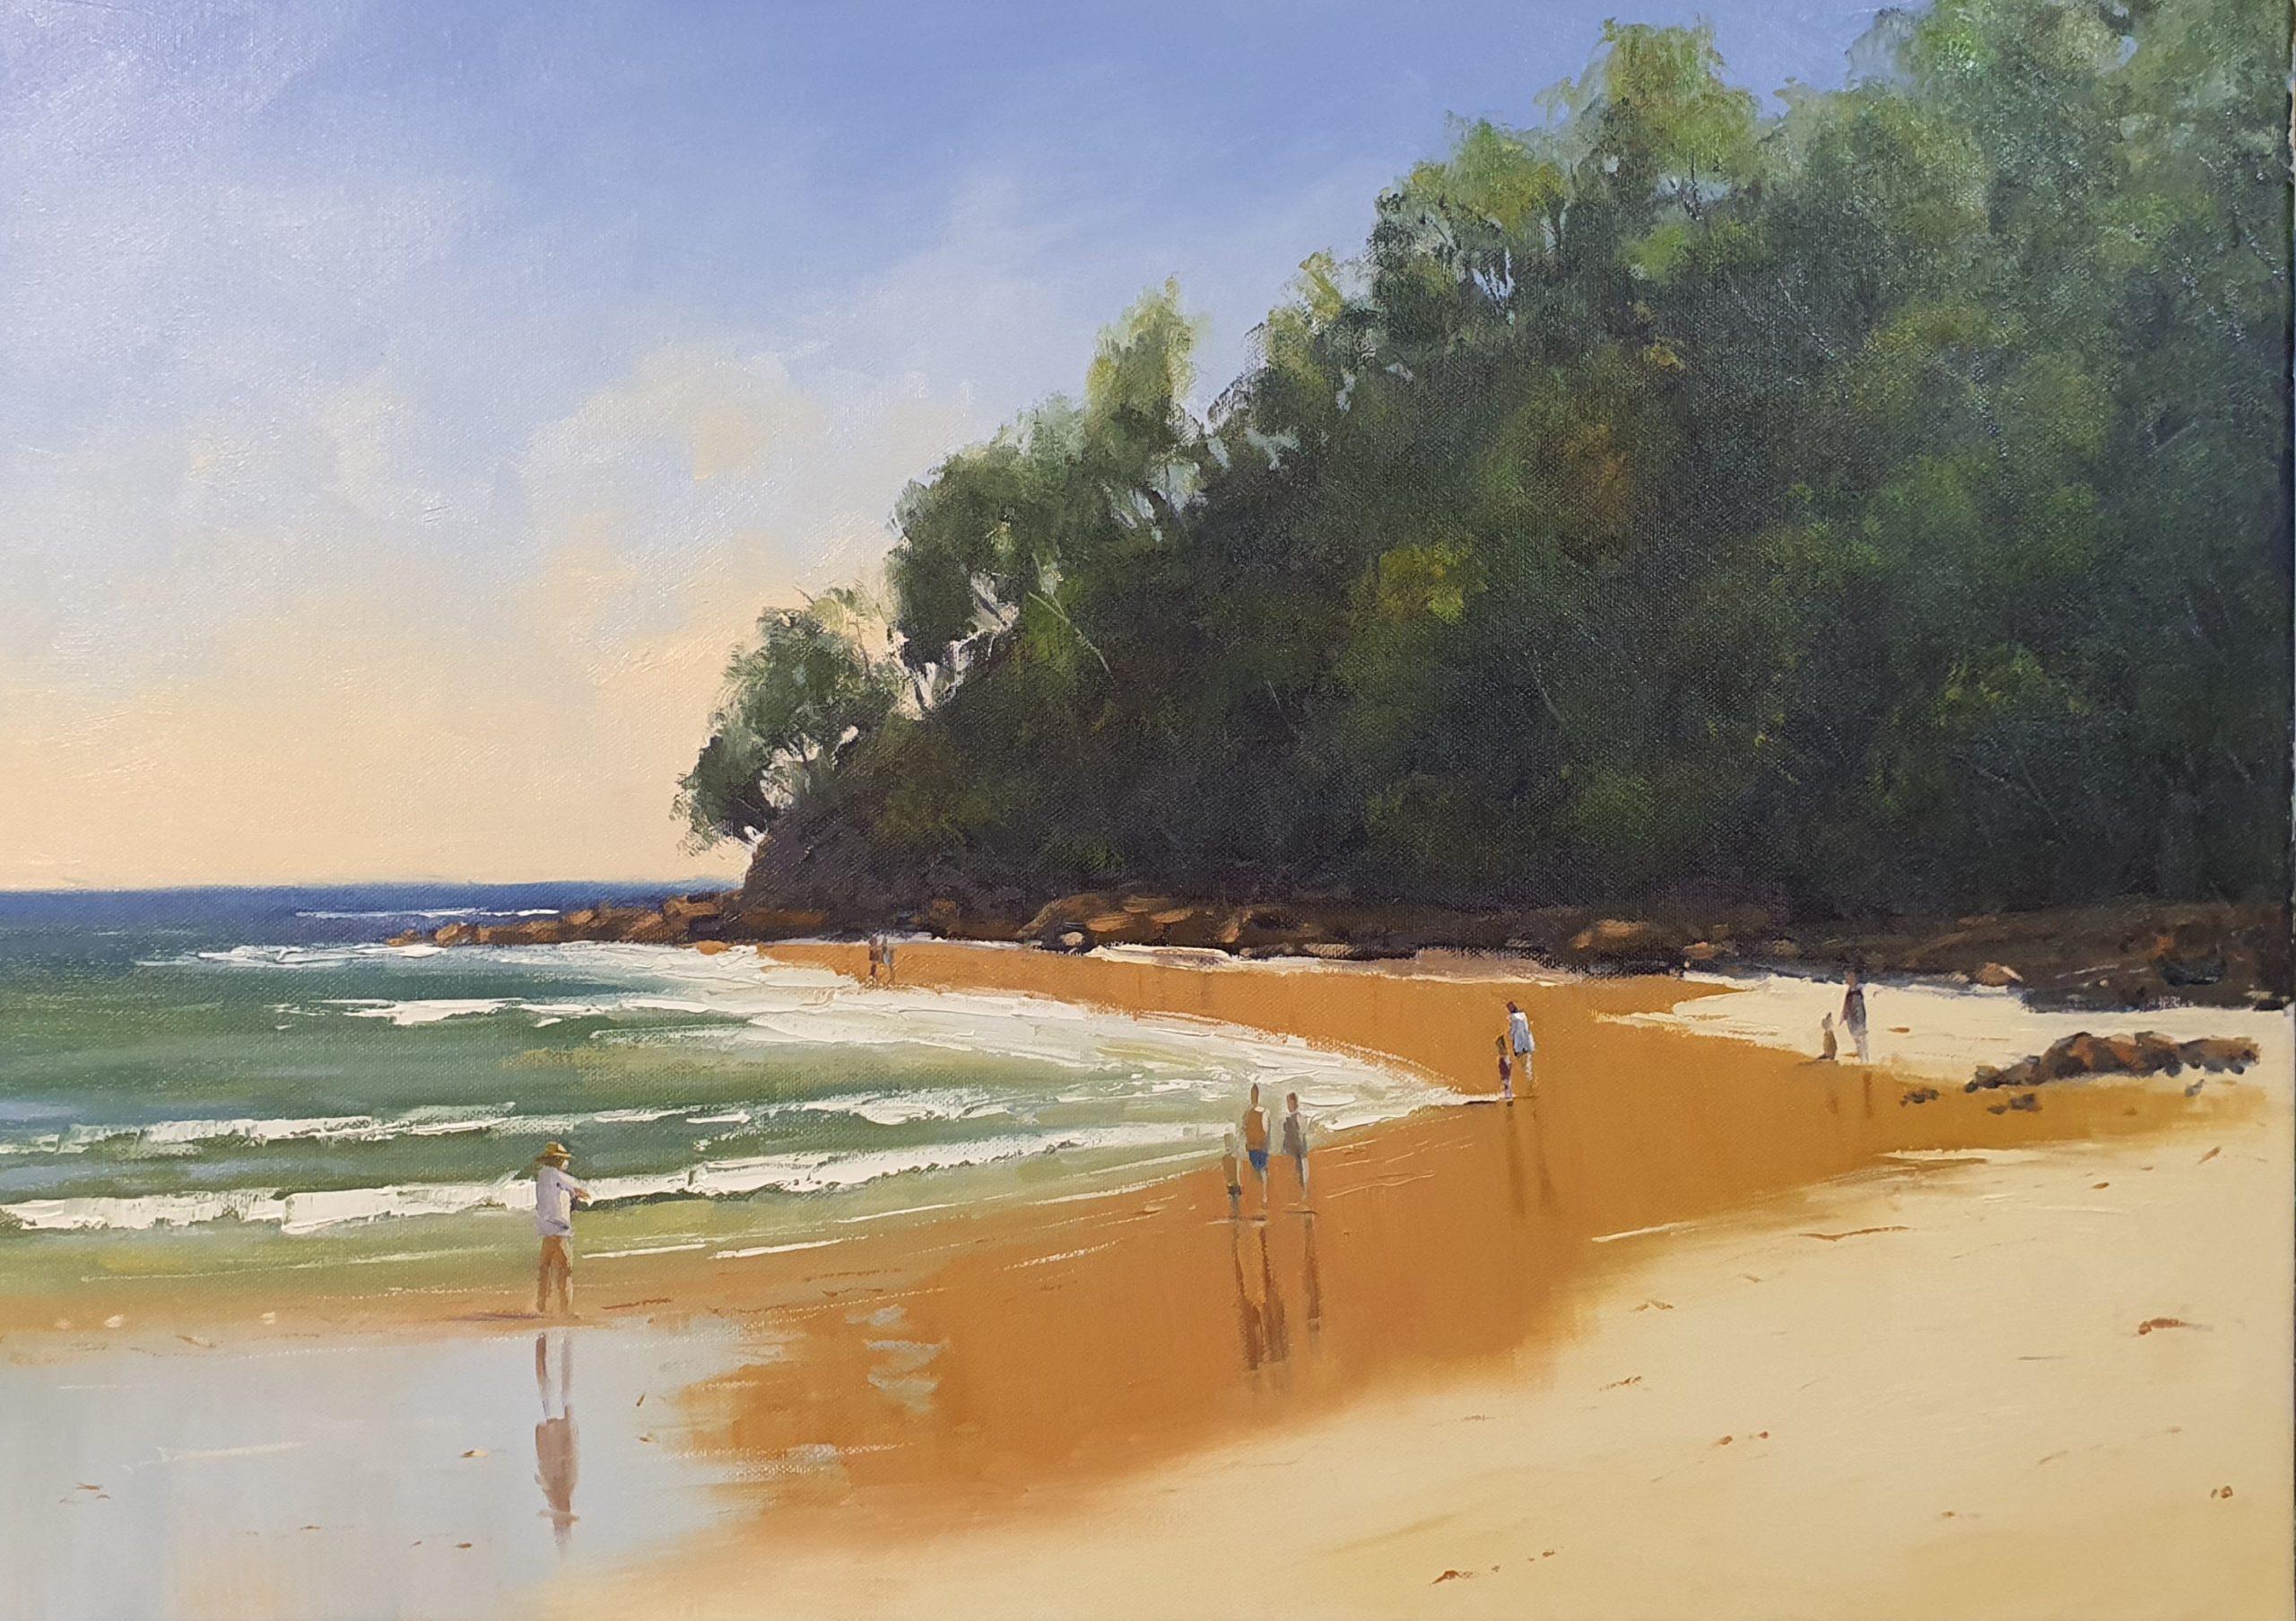
Painting Process Step By Step – Part 2
December 1, 2020In this article we will take a look at the typical painting process step by step that I typically use to create paintings in oils or acrylics.
This is part one of the article on the painting process step by step in which we will look at how I analyzed the subject, and then completed the first two steps of the Moore Method of Painting.
Note – If you are not familiar with the Moore Method of Painting then we recommend taking our 5 Day Painting Challenge where I walk you through the three steps, three brushes and three colours.
Analyzing The Subject
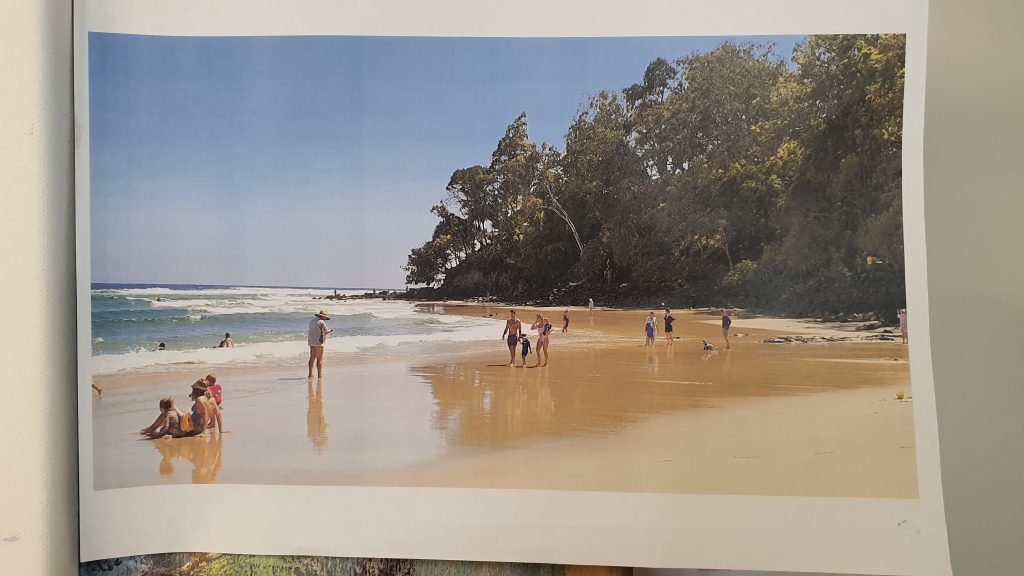
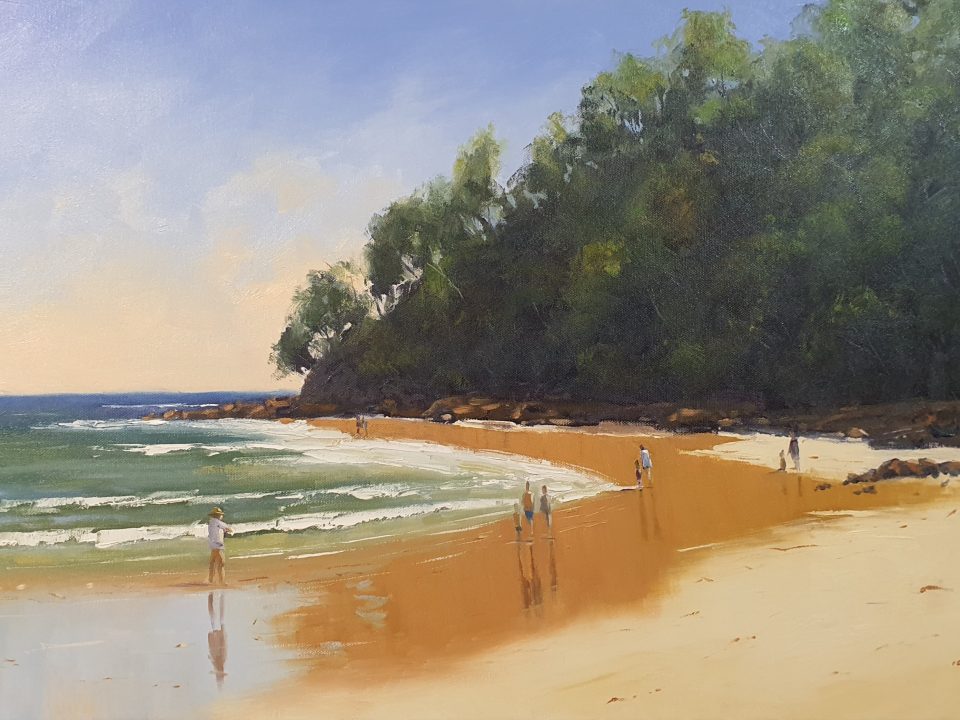
The subject is Noosa First Point a famous long board surfing location in Noosa, Queensland. It’s a subject I have painted before in various formats and it keeps drawing me back to paint it again. In the past I have painted the subject without the people but for the purposes of this painting process step by step article I wanted to include the people.
Note – Whenever I take reference photos like this I always strive to compose the shot as best I can so that it doesn’t require any editing or adjusting to turn it into a good painting subject.
One of the key considerations for me when I analyze any subject is to understand where the darks and lights are and to establish the light pattern. The easiest way to do this is to convert the photo into a black and white version so you can clearly see the values in the subject.
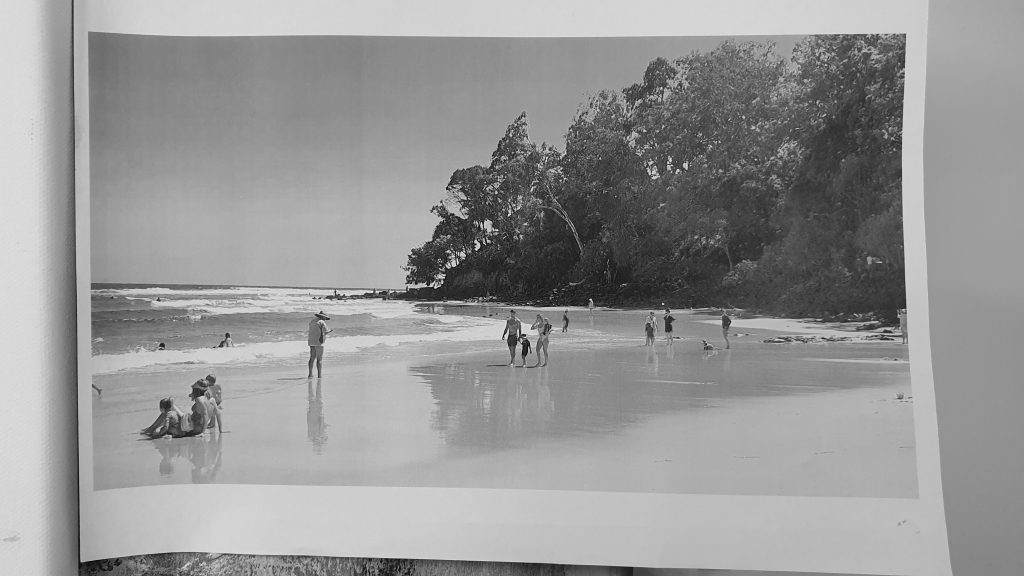
As you can see above this gives us a clear view of where our darkest darks are and the lights.
It’s obvious when you look at this version of the subject that the headland is the darkest mass, followed by the reflections in the wet sand and people, then the water mass. This makes it easy for us to understand how to establish our values in this painting.
The next thing I always consider is the big shapes. You want to analyze your subject and look for the big shapes in it.
In this subject there are 5 big shapes that are important.
They are the sky, the headland, the water, the wet sand and the dry sand.
Note – I am looking for the big shapes as they are key to starting your painting. As we will see shortly when you start drawing in you want to map out your big shapes first to get the composition and design right. As a result I am ignoring the people in the analysis phase.
The Painting Process For This Step By Step Case Study
As mentioned above the painting process we will follow step by step in this article is the Moore Method of Painting. This is a methodology that simplifies things right down into three steps, three base colours, and three brushes.
The three steps of the Moore Method of Painting are:
- Step 1 – The Drawing Step
- Step 2 – The Block In Step
- Step 3 – The Refinement Step
I will explain each of these steps in this article and break the process down for you.
The colours on the palette include:
- Ultramarine Blue
- Alizarin Crimson
- Yellow Ochre
They are my base colours I always use – three primary colours.
In addition I will use some booster colours which include:
- Lemon Yellow
- Cadmium Red
- Pthalo Green
And of course Titanium White.
The paints I am using are Cobra Water Mixable Oil Paints. You could just as easily use acrylics or traditional oils and follow the same process.
Step 1 – The Drawing
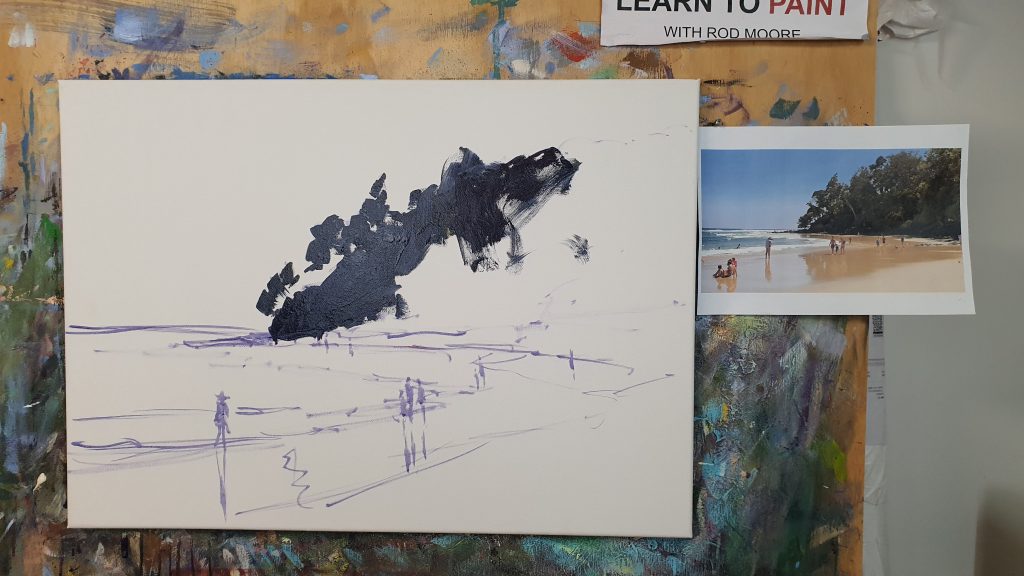
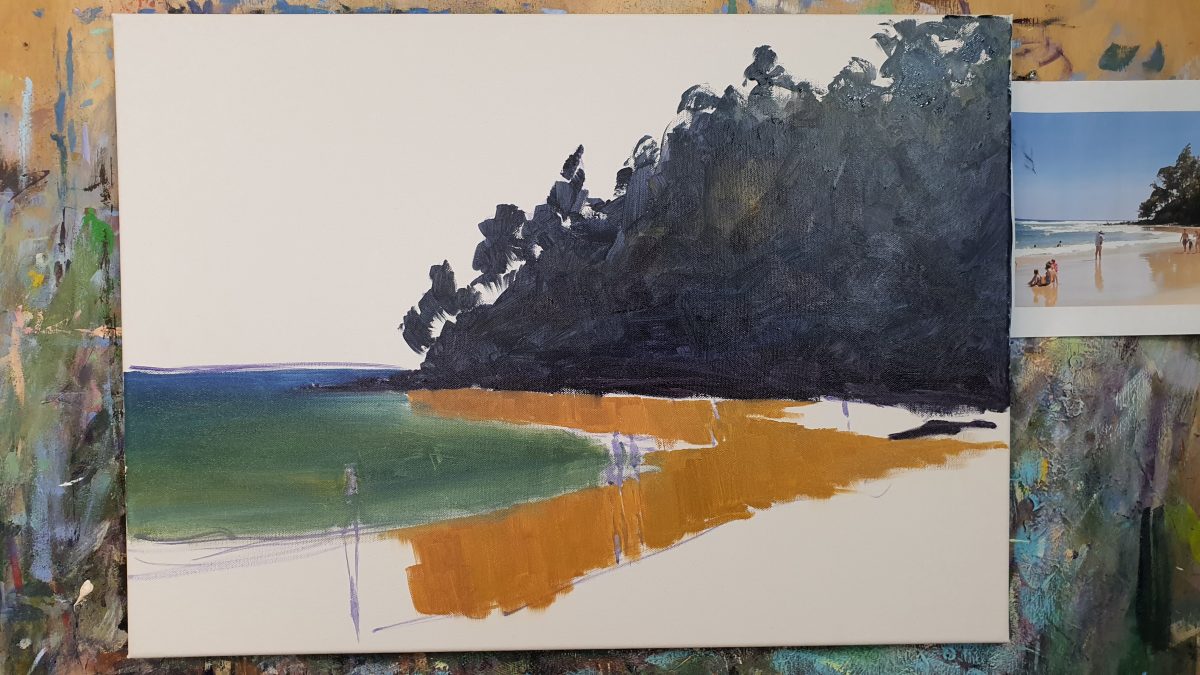
Okay I confess I forgot to get a photo on completion of the drawing step. So this is the drawing step with a the block in started.
Note – I try and keep a copy of the reference material as close to the canvas as I can. I am painting on a 20″ x 28″ canvas.
The idea with the drawing step is simply to place the big shapes we identified in the analysis phase on the canvas. The key is to place the big shapes on the canvas in the right spot and in the right shape.
This is an important step to get right … you want to take your time making sure you have the right shapes placed in the right location on the canvas. It’s difficult to fix design issues when the painting is more developed.
And as I always say …
“No amount of detail later on will fix a painting with a flawed design and composition”
So take your time getting the big shapes placed correctly.
I use a mix of Ultramarine Blue & Alizarin Crimson diluted with water so the paint is thin for the drawing step.
Step 2 – The Block In
Now we move on to our block in step.
I see the primary goal of the block in step is to establish our values. Therefore I always work from the darkest darks to the lights when I block in.
Note – When you get the values pattern right you will establish a sense of depth in your painting. We need to be mindful of the fact we are painting a three dimensional world on a two dimensional surface. Values will create depth, form and a feeling of realism.
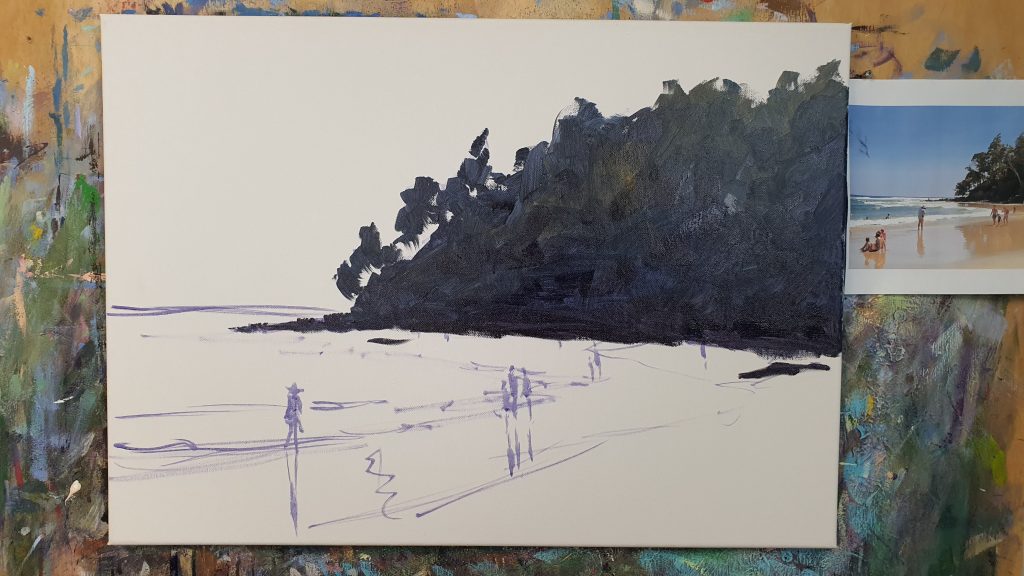
I block in the main headland first because as we saw earlier it is the darkest mass or shape in the painting.
The paint is a mix of Ultramarine Blue, Cadmium Red and Yellow Ochre. This combination gives a strong dark.
Notice I have used the brush to start to form up the shapes of the trees along the top of the headland.
Also important to note is that I keep changing the mix for this dark. Sometimes adding more red, and sometimes more yellow ochre. Its a large mass so you want some variety in your darks. Have a look at this photo for an example:
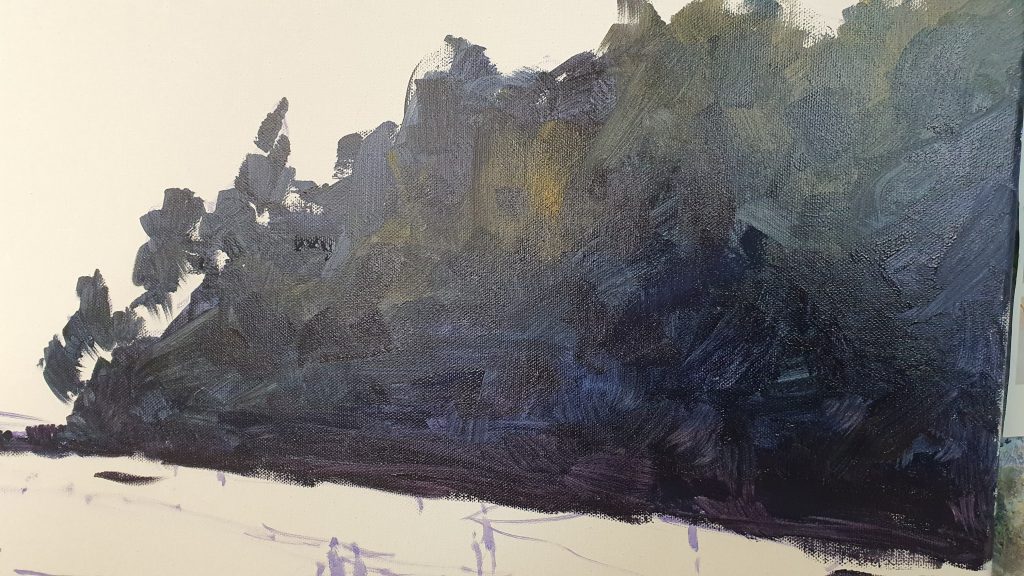
Usually I will go with the warmer colours towards the light and then go cooler away from the light.
The next darkest masses are the wet sand and the water:
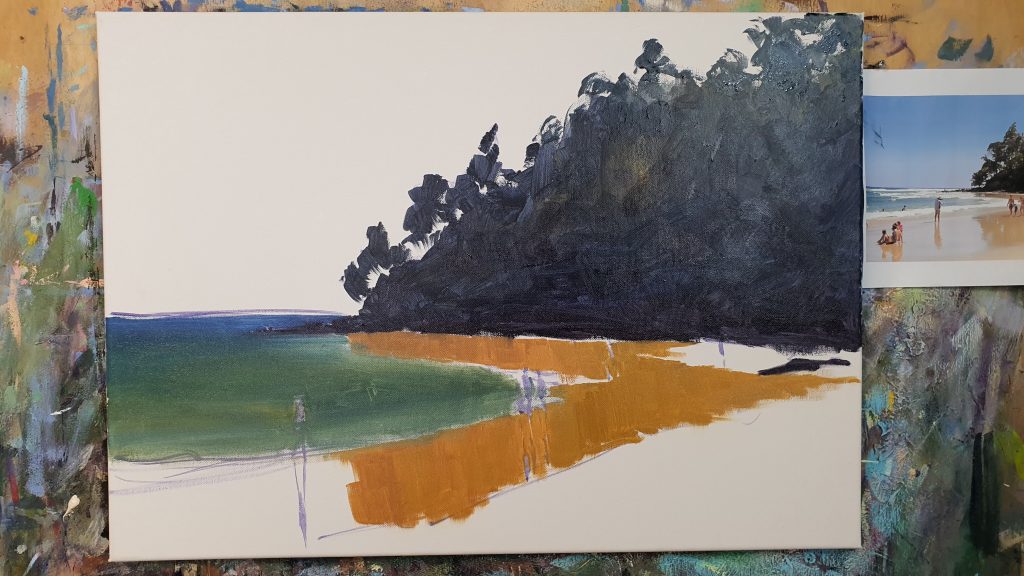
The wet sand area is in two sections. The main part being the reflection of the headland itself.
To achieve this I use a mix of yellow ochre, alizarin crimson and a touch of the ultramarine blue. To this I lighten it off with a bit of white.
To get the reflections looking right I paint them downwards rather than horizontally. I load the brush up, place it at the top and drag it down. This will give you the most realistic looking reflections.
The water is a combination of ultramarine blue ad lemon yellow. Darker blue in the distance and adding more of the yellow as it comes closer to the shore.
Its time to work on the sky …
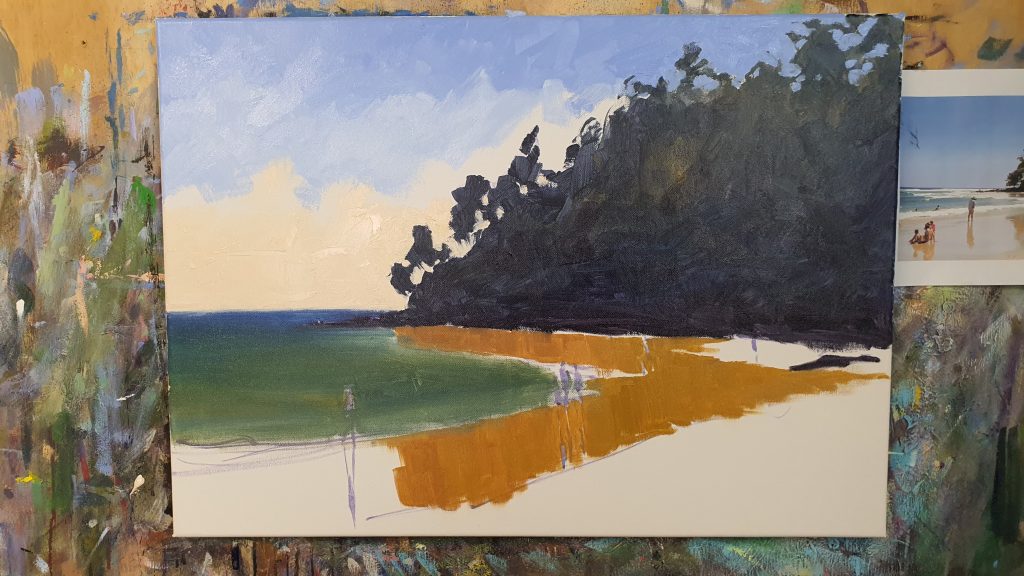
I paint the sky in three sections.
Closest to the horizon it will generally be the lightest value. Often on a warmer day there will be a warmer tone as hot air rises. I use a mix of titanium white, alizarin crimson and yellow ochre. Remember to keep this light so use more titanium white than you think you need.
Next I do the middle part of the sky which is ultramarine blue and titanium white.
Then the top part of the sky is the same as the middle just more of the darker blue.
I paint these three bands first before trying to blend them together.
To blend them I use a clean dry brush and just blend the different sections together.
The final stages of the block in then bring us to this point:
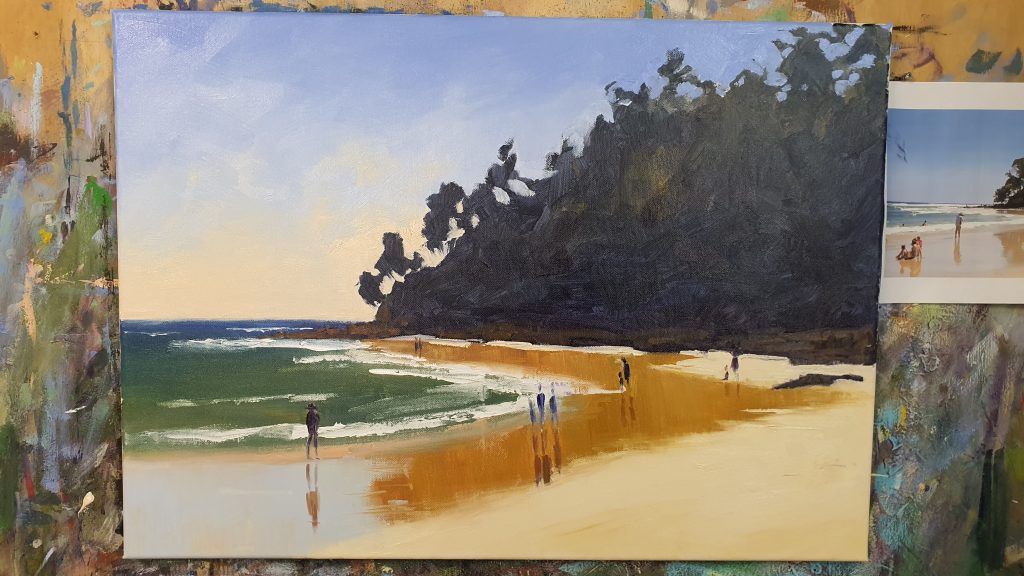
I have used the lower blue sky mix to finish of the wet sand area. As the sand is wet it will reflect the sky.
For the dry sand I have used titanium white and yellow ochre.
With the people I have just used a dark mix to block them in. I’m not concerned about any details with them just yet. Placing them in as a dark is really just a place holder for them so I know where they will go later on.
That brings me to the end of Step 2 – The Block In.
On first glance I am reasonably happy with the progress I have made. I will leave it over night to dry off a little before moving to step 3.
Step 3 In Our Step By Step Painting Process
One of the first things I will do before starting step 3 though will be too analyze where I am up to with fresh eyes. The main thing I will look for in this analysis will be the design and composition, are the shapes right, and are the values correct.
In part 2 of this Painting Process Step By Step article we will move to Step 3 of the Moore Method of Painting which is all about the refinement. Bringing the painting to life with mid tones, highlights and details.
If you have any questions about the progress so far or comments to make then please do so in the comments section


Thanks Rod! Lots of good information in this blog that I will be able to use in my next landscape painting!
Thanks for taking the time to read it Gaetanne and hope the info helps 🙂
Hi Rod, thanks for explaining things clearly, the colours used etc ..i will have a try at this composition myself 🙂
Thanks for reading Denise … yes definitely have a go yourself
Hi Rod
Can you please upload the reference photo so we can have a go at painting it? That would be very helpful. 😊
Cheers
Sheena
Hi Sheena … a copy of the photo is in the blog post. Its the second image
Thanks Rod!
Thanks a lot! Rod for the valuable suggestions regarding landscape painting, definitely these will help me in my future works.
Thanks for reading Dipankar and glad it will help
Thankyou Rod. It’s so helpful to get your emails. I feel encouraged to pick up my brush again . F
I’ve been stuck for a few week with too many other distractions and demands on my time. But you keep me in the zone. It’s really kind.
Thanks for reading Rose and glad to hear its helped 🙂
Thanks a ton,Rod..the step by step instruction has helped me a lot..and a special thanks for sharing your knowledge so generously.
Thanks very much for reading Bappi and glad its helped you
Thank you.. fantastic information! I understand the light blue on shore wash as reflection of water but how did you get the wet effect on the shore wash to the right of the blue reflection on the wet sand?
Thanks so much!
Thanks for reading Janet. The wet sand is simply yellow ochre with a bit of alizarin crimson. Add a pin head of blue to grey it back a bit, and then use white to adjust the value to suit. I drag the brush downwards using a large flat brush.
I’m so glad I joined the Learn to Paint Academy. Your method has helped me a lot. I have leaned a lot from watching you.
Thanks for joining us Christy and terrific to hear it has helped you
Thanks Rod, that’s really useful. I will refer back to this on my next painting. It is useful to know that the big shapes and the composition need to be right, before you proceed.
Thanks for reading Pam and glad you found it useful. Yes I can’t stress the importance of design and composition and getting it right at the start enough 🙂
Great lesson.
Thanks George glad you enjoyed it
As a new lifetime member and a complete beginner thank you for such clear and easy to follow information.
Pleasure Megan … thanks for joining us as a life member
Thank you. Very interesting ailsa
Thanks for reading Alisa
Great lesson! I have a logistics question. How do you attach your canvas to the background board that you have on your easel? Thanks!
Thanks for reading Karen. The back board has a line of screws in it so the canvas stretcher just hooks on top of them
Very good lesson, thank you Rod.
Please advise when step tree will be available?
Thanks for reading … step 3 is available now
Thank you for the fantastic lesson! I never get bored listening to you…real good info in this video!
Great thanks for reading
Can this painting also be done in acrylic, or does it dry too quickly.
Yes definitely it can Marian … use a bit of retarder for the larger shapes to slow the drying time
Awesome
Thanks Joann
Thanks for this info Rod. I have learned a lot on formatting paintings from you and I really appreciate it. At least I am back painting again and I enjoy The Group so much. Thanks again!
Glad you are enjoying it Mary
Thank you for taking the time to put in all the little details in your blog, I enjoyed reading it and got a lot of information out of it, can’t wait to put it into practice.
Glad it helped Franciane. Enjoy your painting
Hi Rod,
Thank so much because of your wonderful landscape painting . I would be appreciated if you teach the portrait painting.
Thanks for reading Kamal … at some point we will include Portrait Painting in the Learn To Paint Academy
Thank you Rod! So easy to follow, great instructions.
I need the colour mixing guide so badly. Love your painting and patience 🌞
Thanks for reading Georgina …. glad it helped. Yes Colour Mixing is a basic skill set artists need. Our Colour Mixing course in the Learn To Paint Academy shows you all you need to get started.